
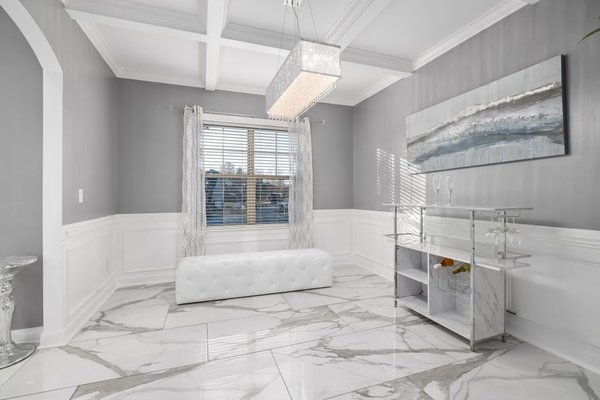
How should I plan a lexington home luxury renovation?
Plan a lexington home luxury renovation by fixing whole-house circulation, room thresholds, built-in dimensions, lighting locations, and one shared paint logic before demolition. Keep repeated trim, floor transitions, door alignments, and sightlines consistent, then let individual rooms vary through furnishings and details rather than changing the architectural language at every doorway.
A connected renovation is planned from the doorway out, not room by room in isolation. Each space should work on its own while the lines, proportions, finishes, and movement between rooms still feel deliberate.
Use the broader luxury home renovation plan to set house-wide rules first. For a project reaching most living areas, think of lexington whole home luxury renovation as one sequence with one set of dimensions and one architectural language.
How do you plan a Lexington home luxury renovation so rooms connect?
Start by mapping what a person sees and where a person walks from one room to the next. A successful Lexington home luxury renovation repeats a few architectural decisions across those transitions while letting each room solve its own storage, seating, and lighting needs.
Begin with a scaled floor plan showing door swings, windows, ceiling changes, furniture footprints, and the points where flooring, trim, cabinetry, or wall finishes meet.
A room-to-room planning sequence
- Mark the main sightlines: Note which rooms appear together from the entry, hall, kitchen opening, and stairs so visible casing heights, floor breaks, and lighting rhythm coordinate.
- Fix circulation: Draw the routes to the kitchen, powder room, stairs, and main seating areas before placing sofas, consoles, islands, or built-ins.
- Choose repeated architecture: Set the baseboard, casing, interior door, hardware, and ceiling-detail language that will recur across adjoining rooms.
- Resolve junctions: Decide floor changes, cabinetry endings, ceiling drops, stair edges, and wall returns on paper rather than during installation.
- Coordinate technical work: Finalize lighting, switches, plumbing moves, HVAC grilles, and structural changes before walls are opened. Use qualified trades and required permits for structural, electrical, plumbing, and HVAC work.
- Release room-specific choices last: Choose furniture, decorative lighting, window treatments, and detailed storage after the shared rules are fixed.
If you are choosing who will execute the work, luxury home renovation contractors for upscale homes is the most relevant next planning topic because coordination across rooms and trades matters as much as individual finishes.
Which layout decisions should be made before demolition?
Decide walls, openings, door swings, cabinet depths, appliance locations, plumbing points, major electrical positions, and the furniture plan before demolition. Those choices affect framing, rough-ins, lighting, flooring, and trim, so late changes create expensive rework.
Work from a measured drawing. An opening that shifts 8 in can determine whether a console fits, a chair clears a passage, or a built-in has enough uninterrupted wall.
- Door and opening positions: Confirm doors do not block another door, cabinet, or circulation route.
- Kitchen and bath footprints: Finalize fixed cabinetry, appliances, plumbing fixtures, and service clearances before rough work.
- Furniture anchors: Place the main sofa, dining table, bed, and media wall at real sizes so outlets, sconces, and ceiling fixtures land usefully.
- Floor transition points: Put thresholds at doorways or logical room breaks instead of leaving them for installers to improvise.
- Lighting relationships: Center fixtures on the furniture or architectural feature they serve, not automatically on the geometric center of the room.
For a luxury home renovation, the premium result comes from alignment: doors that relate to millwork, pendants that relate to an island, and trim that ends cleanly at a planned junction.
What dimensions should be locked before built-ins and furniture are ordered?
Lock walking widths, cabinet depths, door clearances, furniture footprints, and the gaps between major pieces before ordering custom work. Built-ins are unforgiving because small errors can interfere with baseboards, outlets, doors, drapery, or nearby seating.
Account for finished wall surfaces, trim thickness, countertop overhangs, and hardware projection. If framing is open, have the contractor confirm expected finished dimensions before custom fabrication begins.
- Main circulation path 36 in clear
- Sofa to coffee table 16 to 18 in
- Dining chair pull-back zone 36 in from table edge
- Kitchen work aisle 42 in clear for one cook
- Island seating overhang 12 in minimum
- Rug under front sofa legs 8 x 10 ft in a 12 x 15 ft room
Confirm ceiling height anywhere full-height cabinetry, paneling, or tall furniture will be installed. Custom furniture should also be released from the final plan so delivery paths and surrounding clearances are protected.
How should exact paint colors transition between adjoining rooms?
Use one repeated paint color through the most visible connecting walls, then change it only at a clear architectural break such as a doorway, cased opening, or full wall return. This keeps several rooms visually connected without making them identical.
Benjamin Moore Pale Oak with the reference hex #D8CFC4 is a practical connective wall color for halls, living areas, and adjoining circulation spaces.
#D8CFC4 · Benjamin Moore Pale Oak
In south-facing light it reads warmer and can show a slight pink-beige cast; in north-facing light it becomes noticeably grayer. Use it on roughly 60 to 65 percent of the visible painted wall area across connected rooms.
Benjamin Moore White Dove with the reference hex #F0EFE6 works well for repeated trim, interior doors, and selected built-in faces.
#F0EFE6 · Benjamin Moore White Dove
South-facing light makes it read creamier, while north-facing light makes it appear cleaner and slightly cooler. Use it on roughly 15 to 20 percent of the visible painted area, concentrated on trim, doors, and selected millwork.
Do not change paint halfway across a continuous wall. If adjoining rooms need separate identities, make the transition where the architecture provides a clean stop and view samples from both sides before approval.
Which upgrades improve function while respecting the home style?
Prioritize upgrades that make the house easier to use while reinforcing proportions and details already present in the architecture. Storage, lighting, doors, trim, and hardware can feel current without erasing the character that made the house worth renovating.
Start with visible daily function, then repeat a consistent casing profile, hardware family, and millwork proportion so the new work feels intentional.
- Built-in storage: Fit cabinetry to real wall and ceiling conditions where clutter naturally gathers.
- Layered lighting: Give ambient, task, and accent lighting a clear job, with switching that makes sense from the entrance and activity zones.
- Interior doors and trim: Match the scale of existing openings and keep head heights consistent wherever the architecture allows it.
- Hardware: Keep lever, knob, hinge, and cabinet-hardware choices disciplined across adjoining rooms.
- Discreet infrastructure: Plan charging, networking, ventilation, and controls before finish work so technology does not look added later.
In a lexington whole home luxury renovation, restraint matters more than adding a premium finish to every surface. Keep the hierarchy clear: architecture first, useful built-ins second, then furnishings and decorative details.
When does a connected luxury renovation plan not work well?
A whole-house visual system can fail when the existing rooms are genuinely different in scale, light, age, or use and the plan forces them into one formula. Repeating large built-ins, oversized lighting, or heavy trim everywhere can make smaller rooms feel cramped. Continuous open shelving and perfectly styled display walls often work better in photographs than in a household that needs closed storage for mail, toys, pet supplies, electronics, and cleaning gear.
It also stops making sense when the budget cannot finish connected spaces in a coherent sequence. Opening several rooms at once while funding only part of the electrical, flooring, cabinetry, or trim work can create more visible compromises than completing one zone properly. In a rental, do not alter walls, fixed wiring, plumbing, or permanent millwork without written permission. With children or pets, prioritize durable closed storage, protected circulation paths, and stable furniture over delicate display details. A connected plan should make daily life easier, not harder.
Frequently asked questions
Should every room in a renovated home use the same wall paint?
No. Repeating one paint through the most visible connected areas can create continuity, but closed rooms can change where there is a clear architectural break. View samples from both sides of the doorway before approval.
When should custom built-ins be released for fabrication?
Release them after the layout, finished dimensions, electrical locations, trim conditions, and nearby furniture clearances are confirmed. The contractor or fabricator should verify field dimensions before production starts.
How early should lighting locations be decided?
Major ceiling fixtures, sconces, floor boxes, and task-lighting points should be located before rough electrical work. Position them from the final furniture and cabinetry plan rather than the empty room.
Can flooring changes help define separate rooms?
Yes, but the transition should occur at a deliberate threshold or architectural break. Avoid an arbitrary seam in an open sightline because it makes the division look accidental.
What should be measured twice before demolition starts?
Measure openings, wall lengths, ceiling heights, window and door locations, and clear widths around planned furniture or cabinetry. Dimensions controlling custom work, plumbing, structure, or electrical placement should also be verified by the responsible trade.
The strongest connected renovation is not the one with the most expensive individual room. It is the one where circulation, dimensions, paint transitions, lighting, storage, and repeated architectural details agree from one doorway to the next. Lock those shared decisions early, then let each room earn its own character within the plan.