
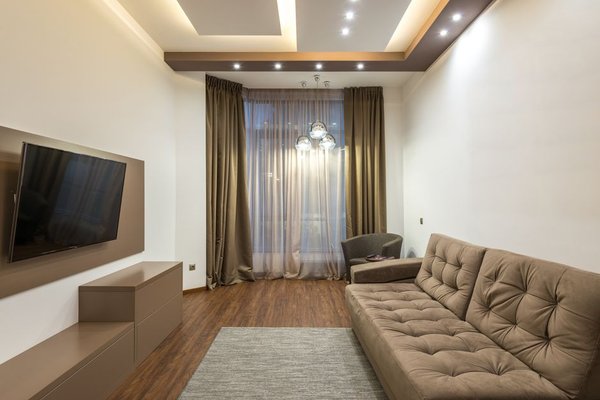
How should I plan a recessed lighting layout?
A practical recessed lighting layout starts with the room dimensions, ceiling height, beamtask zones first, then fill general-lighting gaps evenly. Check joist locations before cutting openings, and keep fixtures far enough from walls to avoid harsh scallops or dark edges.
Recessed lighting works best when you plan the light pattern before choosing exact fixture positions. A neat ceiling grid can still perform poorly if it ignores counters, furniture, walkways, ceiling structure, or the beam spread of the fixture.
How many recessed lights do I need?
There is no fixed number that works for every room. The right quantity depends on room size, ceiling height, fixture output, beam angle, and whether the lights provide general illumination or support specific tasks.
Start by measuring the room in feet and marking permanent features such as cabinets, islands, fireplaces, door swings, and built-ins. Then identify where stronger task lighting is needed. A kitchen counter, for example, deserves more deliberate placement than the center of an open walkway.
A 12-by-12-foot bedroom with an 8-foot ceiling may need only a modest group of fixtures when lamps and other lighting are also present. A similarly sized kitchen may require more because countertops, sinks, and food-preparation areas need useful illumination without shadows from the person standing at the counter.
Fixture performance matters as much as fixture count. Before committing to a quantity, check the manufacturer’s lumen output and beam information. If you are still choosing fixtures, Best Recessed Lights for US Homes: Canless, Retrofit and Smart Picks is the useful next step.
How many recessed lights per room?
Plan each room according to what happens there rather than applying one whole-house formula. Kitchens usually need layered task coverage, while bedrooms and living rooms can often use fewer ceiling fixtures supplemented by lamps or decorative lighting.
| Room type | Useful starting approach | Placement priority |
|---|---|---|
| Kitchen | Use several evenly distributed fixtures plus focused coverage over work surfaces | Counters, sink, range area and island edges |
| Living room | Use a restrained general-lighting grid rather than filling every part of the ceiling | Seating zones, artwork and circulation areas |
| Bedroom | Use fewer fixtures when bedside or floor lamps provide part of the lighting | Open floor area, closets and reading zones |
| Bathroom | Combine general ceiling light with dedicated vanity lighting | Shower area, circulation space and supplemental vanity coverage |
| Hallway | Use a simple centered run with consistent spacing | Continuous illumination along the walking path |
Do not automatically place a recessed fixture in the geometric center of every ceiling section. The room may look symmetrical on a drawing while leaving the most important working surface underlit.
How far apart should recessed lights be?
Spacing should be based on mounting height and the fixture’s light distribution rather than one universal distance. In a typical 8- or 9-foot residential ceiling, many layouts begin with fixtures roughly 4 to 6 feet apart, then adjust according to beam spread, lumen output, and the room’s needs.
Wider beam angles can cover more floor area, while narrower beams create more concentrated pools of light. The manufacturer’s photometric or spacing information is more useful than copying a neighbor’s ceiling pattern because two fixtures that look almost identical can distribute light differently.
Ceiling height changes the result too. A fixture mounted 10 feet above the floor has more distance to spread its beam than the same fixture in an 8-foot ceiling. If you are deciding between trim and aperture dimensions, review recessed lighting sizes before finalizing the openings.
How far should recessed lights be from a wall?
A useful starting point is approximately 18 to 30 inches from the wall in many standard-height rooms, but the correct position depends on what the fixture is meant to illuminate. Move the light according to wall art, cabinets, shelving, work surfaces, and the fixture’s beam pattern rather than treating the distance as a fixed rule.
Placing fixtures extremely close to a wall can create bright streaks or pronounced scallops. Placing them too far inward can leave the room perimeter noticeably darker, particularly when the recessed fixtures are the main source of general light.
Kitchen layouts need extra care. A downlight positioned behind the person standing at a counter can throw their shadow directly onto the work surface. The better ceiling location is usually related to the front portion of the counter rather than simply centered in the open floor.
How to plan the layout room by room
Draw the plan before anyone cuts the ceiling. This makes it much easier to resolve spacing, furniture, cabinets, and ceiling joists without turning installation day into a series of compromises.
- Measure the room: Record the exact length and width in feet and inches, along with ceiling height and any soffits, beams, sloped sections, or ceiling fans.
- Mark permanent features: Add cabinets, islands, fireplaces, showers, built-ins, door swings, and other elements that will influence where light is useful.
- Mark task zones: Identify counters, desks, reading chairs, vanity areas, closets, and other places where people need concentrated illumination.
- Choose the fixture before fixing the spacing: Use the manufacturer’s lumen output, beam angles, aperture size, and recommended spacing information to judge coverage.
- Position task fixtures first: Put the most important lights where they support actual activities instead of starting with an arbitrary ceiling grid.
- Fill the general-lighting gaps: Add remaining fixtures so their light overlaps comfortably rather than producing isolated bright circles separated by darker areas.
- Check the ceiling structure: Confirm joist locations, ducts, plumbing, insulation, and other concealed obstacles before openings are made.
- Review the plan from furniture level: Check whether a fixture will shine directly above a television, create glare over seating, or leave a desk or counter in shadow.
Plan around the ceiling you actually have
Existing framing can move a theoretically perfect layout by several inches. This is one reason canless vs can recessed lighting matters during planning: different fixture constructions have different installation requirements and may offer different options where framing space is limited.
Never cut into joists or alter structural framing simply to preserve a symmetrical lighting pattern. Electrical installation, new wiring, circuit changes, and work around concealed building services should be handled or checked by a qualified electrician as required by local rules.
When does recessed lighting not work well?
Recessed lighting is not automatically the best answer for every ceiling. In a room with a low ceiling, filling the surface with many apertures can make it look busier rather than cleaner. A rental is another poor candidate if installation requires cutting permanent holes, adding wiring, or altering a ceiling without the owner’s written approval.
It also performs badly when the layout is designed only for photographs. Perfectly symmetrical rows can look impressive in an empty room yet place light behind someone working at a kitchen counter, directly above a television, or nowhere near a reading chair. Large quantities of small downlights can also create an airport-runway effect instead of comfortable residential lighting.
Recessed fixtures are weakest when they are expected to do every job alone. Bedrooms and living rooms usually benefit from lamps or other light sources at lower levels, while bathroom mirrors need dedicated face lighting. If the ceiling is unusually low, review low ceiling lighting before deciding that recessed fixtures are necessary at all.
Check the layout before installation
Use painter’s tape or removable paper markers to represent fixture centers on the ceiling or floor before electrical work begins. Stand where the sofa, desk, island stools, bed, and work surfaces will actually be and check whether the proposed lights serve those positions.
- Check that adjacent light patterns will overlap rather than leave obvious dark gaps.
- Confirm that cabinet doors and tall storage will not block useful light.
- Keep fixtures clear of ceiling-fan blade paths and likely glare lines.
- Verify structural and mechanical obstacles before cutting openings.
- Use dimmers and compatible fixtures where adjustable light levels would make the room more useful.
For remodels, concealed conditions may force small changes after the ceiling is inspected. A layout that shifts one fixture by 4 inches to avoid framing is usually preferable to damaging the structure just to keep mathematical symmetry.
Frequently asked questions
Should recessed lights be arranged in a perfect grid?
Not necessarily. A grid can work for simple general lighting, but task zones, furniture, cabinetry, and ceiling structure should take priority over perfect symmetry.
Should recessed lights line up with kitchen cabinets?
They should be positioned to illuminate the countertop effectively rather than merely matching cabinet lines. Check where a person will stand so their body does not block the light reaching the work surface.
Can I mix recessed lighting with lamps and pendants?
Yes. Combining ceiling lighting with lamps, pendants, sconces, or other sources gives you more control over task, ambient, and evening light than relying on downlights alone.
Do higher ceilings need different recessed-light spacing?
Usually, because mounting height changes how the beam reaches the room. Use the selected fixture’s photometric information, beam spread, and recommended spacing instead of automatically copying an 8-foot-ceiling layout.
Should recessed lighting be installed before furniture is chosen?
You can plan the electrical work earlier, but the likely furniture layout should already be known. Seating, desks, beds, televisions, islands, and tables all affect where ceiling light will be useful or distracting.
A successful recessed lighting layout is built around how the room is used, not just how evenly dots can be arranged on a ceiling plan. Measure first, choose the fixture, mark task zones and structural obstacles, and have required electrical work completed by a qualified professional before the ceiling is cut.