
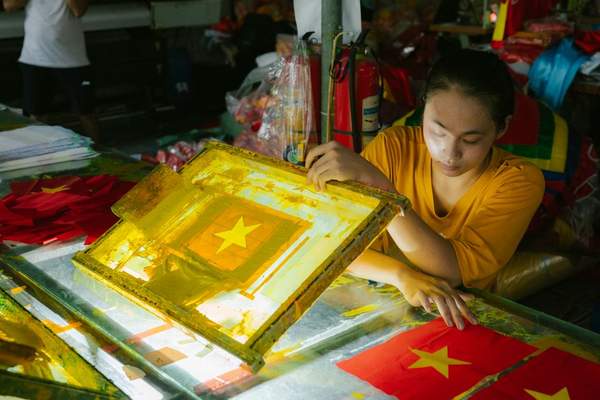
How does diy home decor how to screen print work?
The diy home decor how to screen print process uses a mesh screen, stencil, squeegee, and surface-appropriate ink to push a repeatable design onto fabric or paper. Start with a flat, prewashed surface, make one test print, pull ink evenly through the screen, let the print dry, then cure or finish it exactly as the ink maker directs.
Screen printing suits pillow covers, framed fabric, wall banners, napkins, and small art panels because one graphic can repeat across several pieces. For diy home decor, you control the scale, placement, surface, and ink instead of accepting a ready-made pattern.
Which fabrics and surfaces can you screen print for home decor?
Use surfaces that stay flat under the screen and accept the ink you choose. Cotton, cotton canvas, linen blends, sturdy paper, and cardboard are practical home-project surfaces; slick, stretchy, or heavily textured materials are harder to print cleanly.
Prewash washable fabric so shrinkage happens before printing, skip fabric softener, and iron the print area flat. Put a barrier inside pillow covers, stretch wall-panel fabric flat, and keep table-linen designs away from thick hems or seams.
For paper art, use ink intended for paper or a fabric ink whose manufacturer allows paper use. If you are building easy diy home decor around one motif, repeat it on two or three pieces rather than covering every surface.
What supplies do you need to screen print decor at home?
You need a screen with a stencil, a squeegee, suitable ink, a flat protected surface, masking tape, scrap material for tests, and space for the print to dry. Fabric projects also need a barrier sheet and whatever curing tool the ink manufacturer specifies.
- Screen and stencil: Use a ready-made, paper-stencil, vinyl-stencil, or photo-emulsion setup that fits the design.
- Squeegee: Pick one slightly narrower than the screen’s inside width.
- Ink: Match it to the surface; washable textiles need fabric ink.
- Test material: Keep scrap from the same project beside you.
- Cleanup supplies: Prepare water, approved cleaner, towels, and a wash area before printing.
A small screen, one squeegee, one ink color, and a simple stencil can make several coordinated pieces, which keeps affordable diy home decor from turning into an expensive printmaking setup.
How do you choose ink colors that work with the room?
Take the print color from something fixed in the room, such as the wall paint, large rug, sofa, cabinets, or flooring. Start with one main ink color and judge a test print in the room’s actual daylight before adding another.
A useful light base is Sherwin-Williams Alabaster SW 7008, hex #EDEAE0, covering roughly 60 percent of the room on walls and other large background surfaces. A printed textile against this base can carry a darker or cooler accent without making the scheme busy.
#EDEAE0 · Sherwin-Williams Alabaster
North-facing light can make it look slightly cooler, while south-facing light makes it appear warmer. Use it on walls and other large background areas, roughly 60 percent of the room.
For a dark printed accent, Behr Cracked Pepper PPU18-01, hex #4F5152, provides clear contrast for a simple motif. Keep a color this deep to about 10 to 15 percent of the room through printed fabric, frames, lamp bases, or other small details.
#4F5152 · Behr Cracked Pepper
North-facing light makes it look cooler; south-facing light makes it appear slightly softer. Keep it to about 10 to 15 percent of the room as an accent.
Sherwin-Williams Sea Salt SW 6204, hex #CDD2CA, can fill the middle of the scheme at roughly 25 percent of the room through a smaller wall area, textiles, or painted furniture.
#CDD2CA · Sherwin-Williams Sea Salt
North-facing light pushes it cooler and grayer; south-facing light makes its undertone more noticeable. Use it for about 25 percent of the room on secondary surfaces and textiles.
Print a 4 x 4 in test patch and move it to the place where the finished piece will sit. The same ink can feel heavier beside a dark sofa and sharper against a pale wall.
How do you size a screen-printed design for pillows, art, or fabric panels?
Size the design from the finished object’s visible area, not the raw fabric before sewing or framing. Leave a clear border so the motif does not disappear into seams, hems, frame edges, or the curve of a stuffed pillow.
- Pillow motif on an 18 in cover 8 to 10 in wide
- Pillow motif on a 20 in cover 10 to 12 in wide
- Motif for framed fabric art 7 to 9 in wide on a 12 x 16 in piece
- Motif for a fabric panel 14 to 16 in wide on a 24 in panel
- Border around centered print 2 in minimum
For a centered pillow design, mark the horizontal and vertical center lines with a removable fabric marker approved for the material. On a wall panel, center the image within the visible area after hems and hanging hardware are allowed for.
How do you screen print fabric and art step by step?
Work in one controlled sequence so the screen stays aligned and the ink stays workable. Test first, then repeat the same screen position and squeegee motion on the final pieces.
- Prepare the surface: Prewash washable fabric, dry it fully, iron the print area, and protect the worktop.
- Protect the back: Put a smooth barrier inside covers or beneath thin fabric.
- Position the screen: Measure from two fixed edges and mark the placement with removable tape.
- Test the pull: Print on scrap material to check coverage, pressure, and stencil detail.
- Load the ink: Place a controlled bead above the design instead of flooding the whole screen.
- Pull the print: Use a consistent squeegee angle and one firm, even pass.
- Lift cleanly: Hold the material still and raise the screen straight up.
- Dry undisturbed: Keep hands, pets, and other materials away from the wet ink.
- Cure or finish: Follow the ink maker’s exact time and temperature before washing, sewing, framing, or using the piece.
How do you cure or finish a screen-printed decor piece?
Drying and curing are not the same for washable fabric ink. A print can feel dry while still needing heat to bond properly, so follow the product instructions rather than judging by touch.
Speedball’s general fabric screen-printing guidance allows a household iron for its water-based fabric inks on fabrics that can tolerate 275°F to 375°F, with paper over the design and a 1 to 2 minute ironing period. Directions for your exact ink should control because formulas and fabric requirements differ.
For framed paper art, let the ink dry completely before mounting or trimming it. Do not put a damp print under glass.
When does screen-printed home decor not work well?
Screen printing is a poor choice when the surface cannot lie flat, the fabric cannot tolerate the ink’s curing method, or the design depends on tiny detail that your stencil and mesh cannot hold cleanly. A heavily textured pillow cover may look attractive in a styled photograph, but raised slubs and thick seams can leave broken areas in the print. The same problem appears on deep basket weave, tufted cloth, and uneven upholstery.
It also makes little sense in a rental if the project requires permanent printing directly onto walls, installed shades, or landlord-owned furnishings. Print removable fabric, framed paper, or a purchased pillow cover instead. Homes with pets or young children need practical placement too: a large uncured textile panel within reach can be touched, clawed, folded, or stained before it is ready. A multi-color print requiring perfect registration is also not an easy diy home decor first project; one-color work is far more forgiving.
Frequently asked questions
Can you screen print directly on a finished pillow?
Print the removable cover before inserting the pillow form. Put a flat barrier inside so ink cannot pass through to the back panel.
Do you need a professional press for small home decor projects?
No. Small one-color projects can be printed with a handheld screen and squeegee on a flat table if the screen stays stable and the surface is protected.
Can you wash screen-printed pillow covers?
Only after the fabric ink has been cured exactly as its maker requires. Follow both the ink directions and the fabric care label.
How do you stop a screen print from looking crooked?
Measure from two fixed edges and mark the screen position with removable tape. Keep those guides in place until every repeated piece is finished.
Is one ink color enough for a finished decor project?
Yes. A single well-chosen color can look deliberate on pillows, framed fabric, and small wall panels while keeping registration simple.
Screen printing works best when the design, surface, and room already have a clear job to do together. Keep the first project simple, test placement and color before committing, and repeat one screen across a small set if you want diy home decor how to save money without making every item look mass-produced.